
 免费 AI IDE

Dynamic URL
Dynamic URL
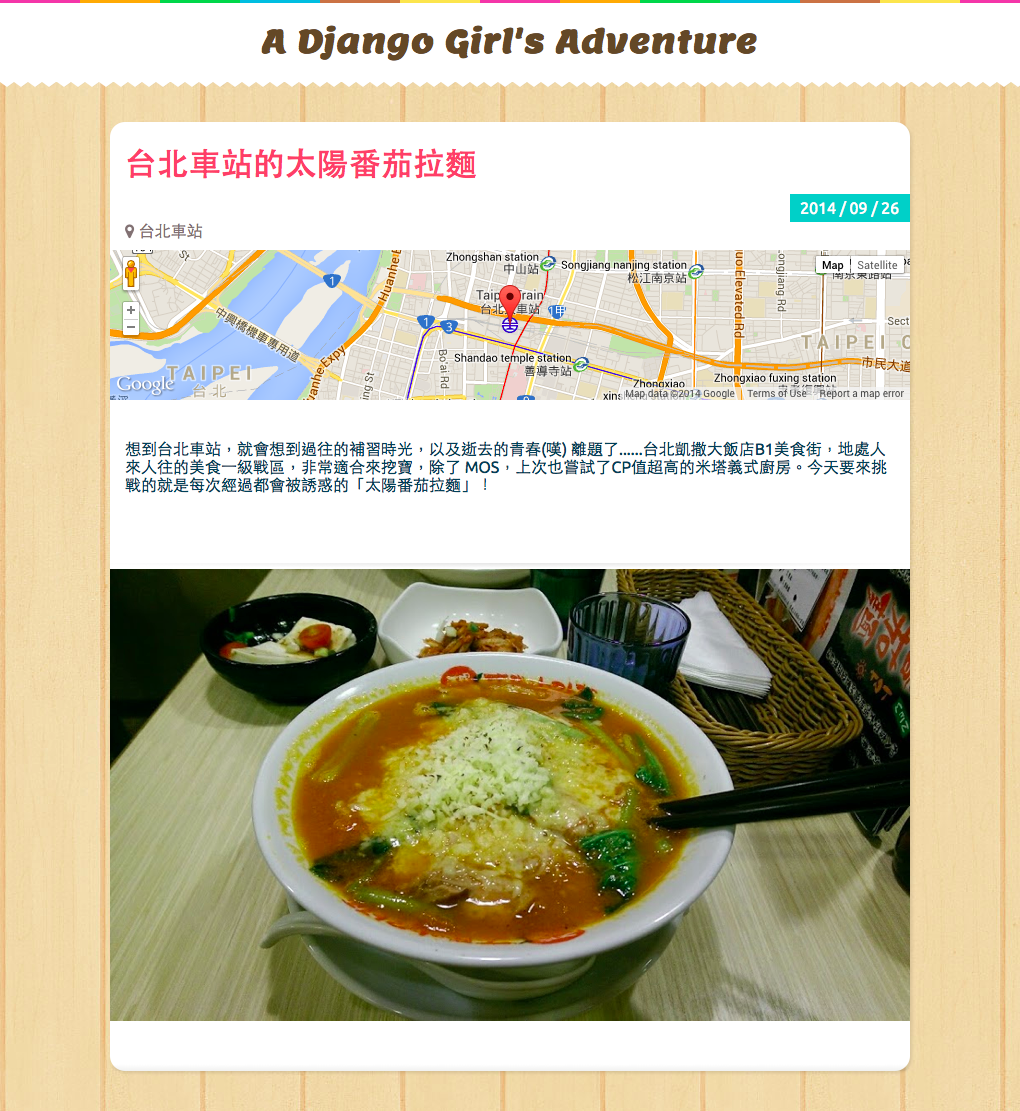
除了在首页显示文章的摘要外,通常也会希望每篇文章能有独立的网址与页面。例如,我们可能会希望 http://127.0.0.1/post/5/ 能够是 id=5 那篇文章的网址,而页面内容则是此篇日记的详细资讯,而非摘要。
在这个章节,我们会学到如何设定动态网址的 URLConf。让每篇旅游日记,拥有独一无二的网址与页面。
建立单篇文章的 View
首先建立单篇文章所使用的 View Function。在 trips/views.py 中新增 post_detail 这个 View 如下:
# trips/views.py

def post_detail(request, id):
    post = Post.objects.get(id=id)
    return render(request, 'post.html', {'post': post})
我们以访客浏览
http://127.0.0.1:8000/post/5/的例子,来解释以上程式:
-
目前浏览文章的 id 会传入 View 中: 当访客浏览
http://127.0.0.1/post/5/时,传入 View 的 id 会是 5。 -
URL 与 id 的对应,会在稍后设定。这裡只需知道 View 中传入的,会是当前浏览文章 id 即可。
-
取得传入 id 的那篇 Post 资料: 当传入的 id=5,代表访客想看到 id=5 那篇文章。我们可以利用之前学过的 ORM 语法
get, 取得该篇日记的 Post 物件:
post = Post.objects.get(id=id) # 此时 id = 5- 回传 HttpResponse: 将取得的 post ( id=5 ) 传入 Template ( post.html ),并呈现 Render 后的结果。
设定动态网址的对应
日记单页的 View Function 完成后,我们来设定网址与 View 的对应。修改 mysite/urls.py ,加入以下内容:
# mysite/urls.py
from trips.views import hello_world, home, post_detail

urlpatterns = patterns('',
    ...
    url(r'^post/(?P<id>\d+)/$', post_detail, name='post_detail'),
)上面的修改完成后,只要连至http://127.0.0.1/post/5/ 就会对应到 post_detail() 这个 View,并且传入的 id = 5 。
使用 Regex 提取部份 URL 为参数
我们前面提过,Django 的 URL 是一个 Regular Expression (Regex)。Regular expression 可用来描述一个字串的样式。 除了可以表示固定字串之外,还可以用来表示不确定的内容。我们一步一步解释文章单页所使用的 URL 设定:
(?P<id>\d+)-
\d代表一个阿拉伯数字。 -
+代表「一个以上」。所以
\d+代表一个以上的阿拉伯数字,例如「0」、「99」、「12345」。可是像「8a」就不符合,因为「a」不是数字。 -
(?P<id>)代表「把这一串东西抓出来,命名为 id。所以
(?P<id>\d+)代表:抓出一个以上阿拉伯数字,并把抓出来的东西取名为 id。
所以 r'^post/(?P<id>\d+)/$' 会达成以下的效果:
| URL | 符合结果 |
|---|---|
| http://127.0.0.1/posts/ | 不符合,因为前面不是 post/ 开头。 |
| http://127.0.0.1/post/ | 不符合,因为后面抓不到数字。 |
| http://127.0.0.1/post/1/ | 符合,抓到的 id 是 1。 |
| http://127.0.0.1/post/1234/ | 符合,抓到的 id 是 1234。 |
| http://127.0.0.1/post/12ab/ | 不符合,因为后面有不是数字的东西。 |
建立单篇日记页的 Template
回顾一下之前写的 View Function ( post_detail ) 的内容
return render(request, 'post.html', {'post': post})我们取得所需 post 物件后,传入 post.html 这个 template 中 render,现在我们就来完成这个 Template。建立 post.html 如下:
<!-- templates/post.html -->

<!DOCTYPE html>
<html>
<head>
    <meta charset="utf-8">
    <title>A Django Girl's Adventure</title>
    <link href="https://link.w3cschool.cn/?target=%2F%2Ffonts.googleapis.com%2Fcss%3Ffamily%3DLemon" rel="external nofollow" target="_blank"  rel="stylesheet" type="text/css">
    <link href="https://link.w3cschool.cn/?target=%2F%2Fmaxcdn.bootstrapcdn.com%2Ffont-awesome%2F4.2.0%2Fcss%2Ffont-awesome.min.css" rel="external nofollow" target="_blank"  rel="stylesheet" type="text/css">
    <link href="https://link.w3cschool.cn/?target=%2F%2Fdjangogirlstaipei.github.io%2Fassets%2Fcss%2Fstyle.css" rel="external nofollow" target="_blank"  rel="stylesheet" type="text/css">
</head>
<body>
    <div class="header">
        <h1 class="site-title text-center">
            <a href="/">A Django Girl's Adventure</a>
        </h1>
    </div>
    <div class="container post post-detail">
        <div class="post-heading">
            <h1 class="title"><a href="{% url 'post_detail' id=post.id %}">{{ post.title }}</a>
            </h1>
            <div class="date">{{ post.created_at|date:'Y / m / d' }}</div>
        </div>
        <div class="location">
            <i class="fa fa-map-marker"></i>
            <span id="location-content">{{ post.location }}</span>
        </div>
        <div id="map-canvas" class="map"></div>
        <div class="post-content">
            {{ post.content }}
        </div>
        <hr class="fancy-line">
        <img class="photo" src="{{ post.photo }}" alt="">
    </div>
    <script src="https://atts.w3cschool.cn/attachments/image/cimg/js?v=3.exp&libraries=places&sensor=false"></script>
    <script src="https://atts.w3cschool.cn/attachments/image/cimg/map.js"></script>
</body>
</html>
说明:
-
将 post 物件的属性 (e.g. 标题、内文、时间......等),利用
{{ var }}与 Template Filter 显示并格式化于 HTML 中 -
若资料库裡有 id=5 的 Post,现在连至 http://127.0.0.1:8000/post/5/ 即可看到此日记的单页
加入到单篇日记页的连结
最后,我们还需在首页加上单篇日记的连结。我们可以使用 {% url %}这个 Template Tag 达成,需要加入的地方有:
- 每篇日记的标题
- 每篇日记的 Read More 按钮
{% url %}
连结到特定 View 的 Template Tag
使用方法:
| 语法 | 说明 |
|---|---|
{% url '<view_name>' %} |
使用在 urls.py 中设定的 name |
也可以传入参数,如:
{% url '<view_name>' arg1=<var1> arg2=<var2> ...%}其馀用法可参考 Template Tag: url
现在我们开始加入详细页的连结,需要加入的地方有
- 每篇日记
- 每篇日记的 Read More 按钮
设定标题连结
打开 home.html,找到下面的内容:
<!-- home.html -->

<h2 class="title">
    <a href="#">{{ post.title }}</a>
</h2>
将它改成
<!-- home.html -->

<h2 class="title">
    <a href="{% url 'post_detail' id=post.id %}">{{ post.title }}</a>
</h2>
设定 Read More 按钮的连结
在 home.html 中找到以下内容:
<!-- home.html -->

<a class="read-more" href="#">
    Read More <i class="fa fa-arrow-right"></i>
</a>
修改如下:
<!-- home.html -->

<a class="read-more" href="{% url 'post_detail' id=post.id %}">
    Read More <i class="fa fa-arrow-right"></i>
</a>
验收成果
连至 http://127.0.0.1:8000/ ,现在只要点击各个日记的标题或 Read more 按钮,就会显示那该篇日记的详细页面。


更多建议: