
 免费 AI IDE

鸿蒙OS 页面路由
2020-09-18 13:57 更新
很多应用由多个页面组成,比如用户可以从音乐列表页面点击歌曲,跳转到该歌曲的播放界面。开发者需要通过页面路由将这些页面串联起来,按需实现跳转。
页面路由 router 根据页面的 uri 来找到目标页面,从而实现跳转。以最基础的两个页面之间的跳转为例,具体实现步骤如下:
- 创建两个页面。
- 修改配置文件 config.json。
- 调用 router.push() 路由到详情页。
- 调用 router.back() 回到首页。
创建两个页面
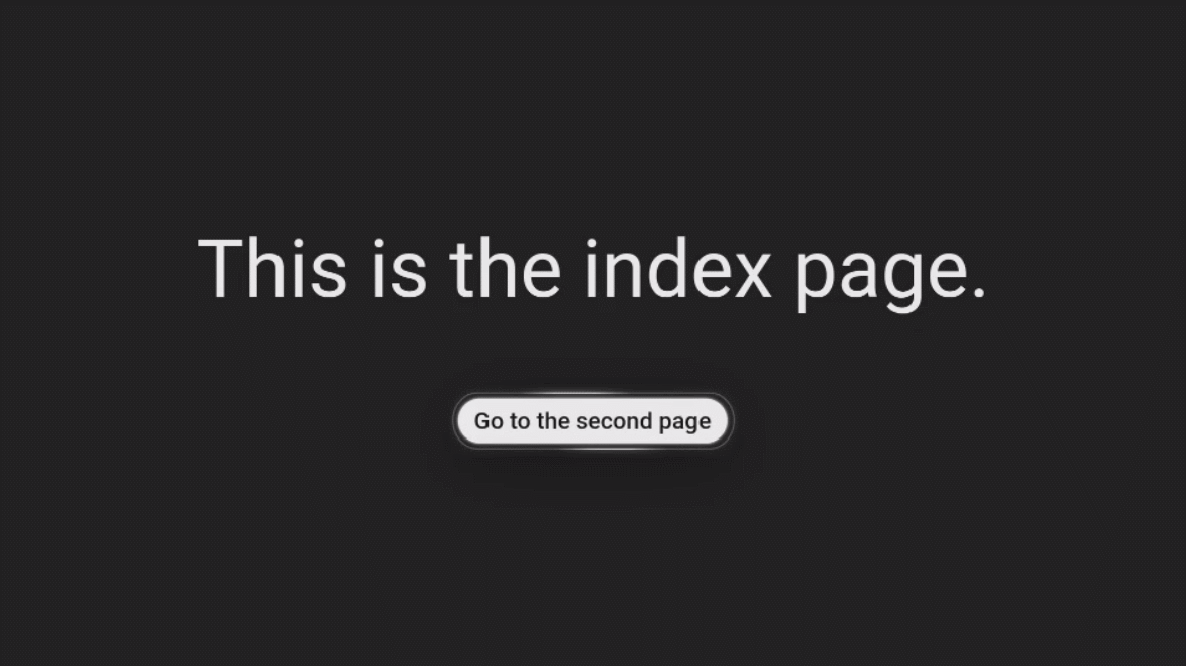
创建 index 和 detail 页面,这两个页面均包含一个 text 组件和 button 组件:text 组件用来指明当前页面,button 组件用来实现两个页面之间的相互跳转。hml 文件代码示例如下:
<!-- index.hml -->
<div class="container">
  <div class="text-div">
    <text class="title">This is the index page.</text>
  </div>
  <div class="button-div">
    <button type="capsule" value="Go to the second page" onclick="launch"></button>
  </div>
</div>
<!-- detail.hml -->
<div class="container">
<div class="text-div">
<text class="title">This is the detail page.</text>
</div>
<div class="button-div">
<button type="capsule" value="Go back" onclick="launch"></button>
</div>
</div>修改配置文件
config.json 文件是配置文件,主要包含了 JS FA 页面路由信息。开发者新创建的页面都要在配置文件的pages 标签中进行注册,处于第一位的页面为首页,即点击图标后的主页面。
{
...
  "pages": [
    "pages/index/index",
    "pages/detail/detail"
  ],
...
}
实现跳转
为了使 button 组件的 launch 方法生效,需要在页面的 js 文件中实现跳转逻辑。调用 router.push() 接口将 uri 指定的页面添加到路由栈中,即跳转到 uri 指定的页面。在调用 router 方法之前,需要导入 router 模块。代码示例如下:
// index.js
import router from '@system.router';
export default {
  launch: function() {
    router.push ({
      uri: 'pages/detail/detail',
    });
  },
}
// detail.js
import router from '@system.router';
export default {
launch: function() {
router.back();
},
}运行效果如下图所示:
图1 页面路由效果
以上内容是否对您有帮助:
← 鸿蒙OS 事件


更多建议: