
tf.contrib.learn Quickstart
tf.contrib.learn Quickstart
TensorFlow’s high-level machine learning API (tf.contrib.learn) makes it easy to configure, train, and evaluate a variety of machine learning models. In this tutorial, you’ll use tf.contrib.learn to construct a neural network classifier and train it on the Iris data set to predict flower species based on sepal/petal geometry. You'll write code to perform the following five steps:
- Load CSVs containing Iris training/test data into a TensorFlow
Dataset - Construct a neural network classifier
- Fit the model using the training data
- Evaluate the accuracy of the model
- Classify new samples
NOTE: Remember to install TensorFlow on your machine before getting started with this tutorial.
Complete Neural Network Source Code
Here is the full code for the neural network classifier:
from __future__ import absolute_import
from __future__ import division
from __future__ import print_function

import os
import urllib

import numpy as np
import tensorflow as tf

# Data sets
IRIS_TRAINING = "iris_training.csv"
IRIS_TRAINING_URL = "http://download.tensorflow.org/data/iris_training.csv"

IRIS_TEST = "iris_test.csv"
IRIS_TEST_URL = "http://download.tensorflow.org/data/iris_test.csv"

def main():
  # If the training and test sets aren't stored locally, download them.
  if not os.path.exists(IRIS_TRAINING):
    raw = urllib.urlopen(IRIS_TRAINING_URL).read()
    with open(IRIS_TRAINING, "w") as f:
      f.write(raw)

  if not os.path.exists(IRIS_TEST):
    raw = urllib.urlopen(IRIS_TEST_URL).read()
    with open(IRIS_TEST, "w") as f:
      f.write(raw)

  # Load datasets.
  training_set = tf.contrib.learn.datasets.base.load_csv_with_header(
      filename=IRIS_TRAINING,
      target_dtype=np.int,
      features_dtype=np.float32)
  test_set = tf.contrib.learn.datasets.base.load_csv_with_header(
      filename=IRIS_TEST,
      target_dtype=np.int,
      features_dtype=np.float32)

  # Specify that all features have real-value data
  feature_columns = [tf.contrib.layers.real_valued_column("", dimension=4)]

  # Build 3 layer DNN with 10, 20, 10 units respectively.
  classifier = tf.contrib.learn.DNNClassifier(feature_columns=feature_columns,
                                              hidden_units=[10, 20, 10],
                                              n_classes=3,
                                              model_dir="/tmp/iris_model")
  # Define the training inputs
  def get_train_inputs():
    x = tf.constant(training_set.data)
    y = tf.constant(training_set.target)

    return x, y

  # Fit model.
  classifier.fit(input_fn=get_train_inputs, steps=2000)

  # Define the test inputs
  def get_test_inputs():
    x = tf.constant(test_set.data)
    y = tf.constant(test_set.target)

    return x, y

  # Evaluate accuracy.
  accuracy_score = classifier.evaluate(input_fn=get_test_inputs,
                                       steps=1)["accuracy"]

  print("\nTest Accuracy: {0:f}\n".format(accuracy_score))

  # Classify two new flower samples.
  def new_samples():
    return np.array(
      [[6.4, 3.2, 4.5, 1.5],
       [5.8, 3.1, 5.0, 1.7]], dtype=np.float32)

  predictions = list(classifier.predict(input_fn=new_samples))

  print(
      "New Samples, Class Predictions:    {}\n"
      .format(predictions))

if __name__ == "__main__":
    main()
The following sections walk through the code in detail.
Load the Iris CSV data to TensorFlow
The Iris data set contains 150 rows of data, comprising 50 samples from each of three related Iris species: Iris setosa, Iris virginica, and Iris versicolor.
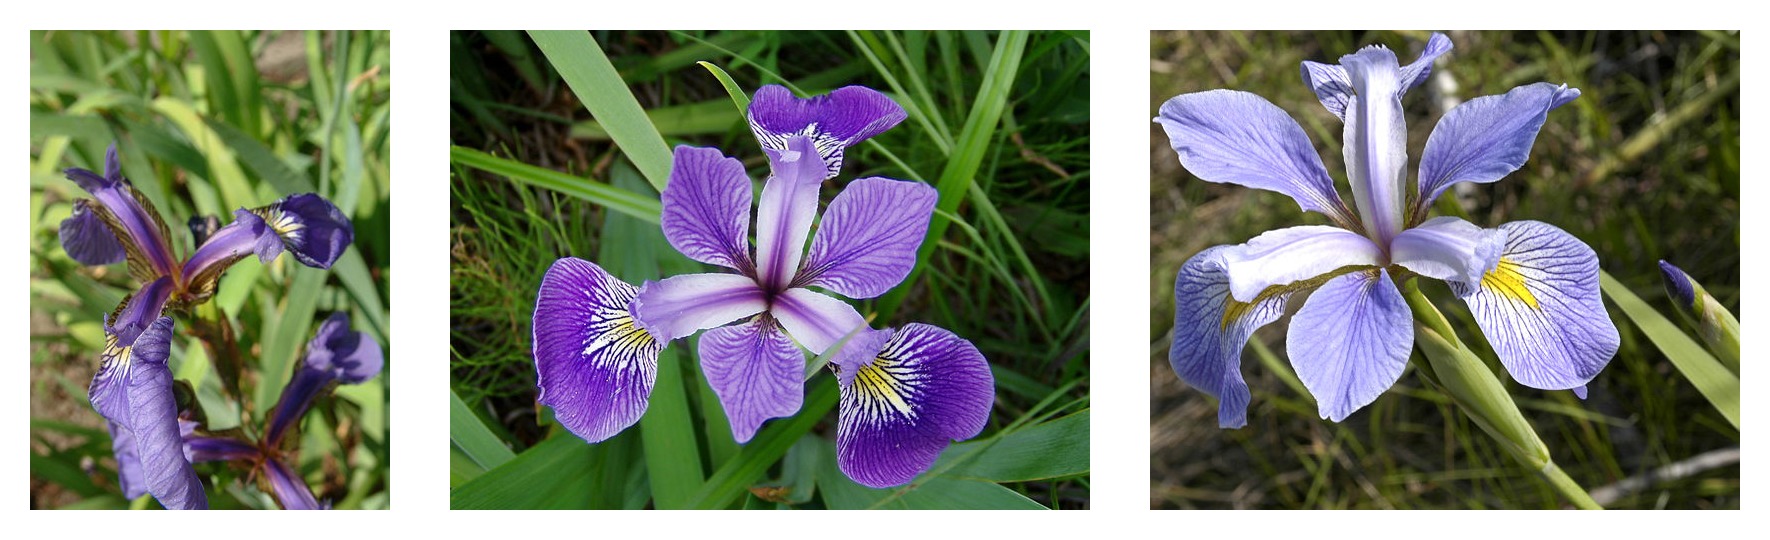 From left to right, Iris setosa (by Radomil, CC BY-SA 3.0), Iris versicolor (by Dlanglois, CC BY-SA 3.0), and Iris virginica (by Frank Mayfield, CC BY-SA 2.0).
Each row contains the following data for each flower sample: sepal length, sepal width, petal length, petal width, and flower species. Flower species are represented as integers, with 0 denoting Iris setosa, 1 denoting Iris versicolor, and 2 denoting Iris virginica.
| Sepal Length | Sepal Width | Petal Length | Petal Width | Species |
|---|---|---|---|---|
| 5.1 | 3.5 | 1.4 | 0.2 | 0 |
| 4.9 | 3.0 | 1.4 | 0.2 | 0 |
| 4.7 | 3.2 | 1.3 | 0.2 | 0 |
| … | … | … | … | … |
| 7.0 | 3.2 | 4.7 | 1.4 | 1 |
| 6.4 | 3.2 | 4.5 | 1.5 | 1 |
| 6.9 | 3.1 | 4.9 | 1.5 | 1 |
| … | … | … | … | … |
| 6.5 | 3.0 | 5.2 | 2.0 | 2 |
| 6.2 | 3.4 | 5.4 | 2.3 | 2 |
| 5.9 | 3.0 | 5.1 | 1.8 | 2 |
For this tutorial, the Iris data has been randomized and split into two separate CSVs:
- A training set of 120 samples (iris_training.csv)
- A test set of 30 samples (iris_test.csv).
To get started, first import all the necessary modules, and define where to download and store the dataset:
from __future__ import absolute_import
from __future__ import division
from __future__ import print_function

import os
import urllib

import tensorflow as tf
import numpy as np

IRIS_TRAINING = "iris_training.csv"
IRIS_TRAINING_URL = "http://download.tensorflow.org/data/iris_training.csv"

IRIS_TEST = "iris_test.csv"
IRIS_TEST_URL = "http://download.tensorflow.org/data/iris_test.csv"
Then, if the training and test sets aren't already stored locally, download them.
if not os.path.exists(IRIS_TRAINING):
  raw = urllib.urlopen(IRIS_TRAINING_URL).read()
  with open(IRIS_TRAINING,'w') as f:
    f.write(raw)

if not os.path.exists(IRIS_TEST):
  raw = urllib.urlopen(IRIS_TEST_URL).read()
  with open(IRIS_TEST,'w') as f:
    f.write(raw)
Next, load the training and test sets into Datasets using the load_csv_with_header() method in learn.datasets.base. The load_csv_with_header() method takes three required arguments:
-
filename, which takes the filepath to the CSV file -
target_dtype, which takes thenumpydatatype of the dataset's target value. -
features_dtype, which takes thenumpydatatype of the dataset's feature values.
Here, the target (the value you're training the model to predict) is flower species, which is an integer from 0–2, so the appropriate numpy datatype is np.int:
# Load datasets.
training_set = tf.contrib.learn.datasets.base.load_csv_with_header(
    filename=IRIS_TRAINING,
    target_dtype=np.int,
    features_dtype=np.float32)
test_set = tf.contrib.learn.datasets.base.load_csv_with_header(
    filename=IRIS_TEST,
    target_dtype=np.int,
    features_dtype=np.float32)
Datasets in tf.contrib.learn are named tuples; you can access feature data and target values via the data and target fields. Here, training_set.data and training_set.target contain the feature data and target values for the training set, respectively, and test_set.data and test_set.target contain feature data and target values for the test set.
Later on, in "Fit the DNNClassifier to the Iris Training Data," you'll use training_set.data and training_set.target to train your model, and in "Evaluate Model Accuracy," you'll use test_set.data and test_set.target. But first, you'll construct your model in the next section.
Construct a Deep Neural Network Classifier
tf.contrib.learn offers a variety of predefined models, called Estimators, which you can use "out of the box" to run training and evaluation operations on your data. Here, you'll configure a Deep Neural Network Classifier model to fit the Iris data. Using tf.contrib.learn, you can instantiate your tf.contrib.learn.DNNClassifier with just a couple lines of code:
# Specify that all features have real-value data
feature_columns = [tf.contrib.layers.real_valued_column("", dimension=4)]

# Build 3 layer DNN with 10, 20, 10 units respectively.
classifier = tf.contrib.learn.DNNClassifier(feature_columns=feature_columns,
                                            hidden_units=[10, 20, 10],
                                            n_classes=3,
                                            model_dir="/tmp/iris_model")
The code above first defines the model's feature columns, which specify the data type for the features in the data set. All the feature data is continuous, so tf.contrib.layers.real_valued_column is the appropriate function to use to construct the feature columns. There are four features in the data set (sepal width, sepal height, petal width, and petal height), so accordingly dimension must be set to 4 to hold all the data.
Then, the code creates a DNNClassifier model using the following arguments:
-
feature_columns=feature_columns. The set of feature columns defined above. -
hidden_units=[10, 20, 10]. Three hidden layers, containing 10, 20, and 10 neurons, respectively. -
n_classes=3. Three target classes, representing the three Iris species. -
model_dir=/tmp/iris_model. The directory in which TensorFlow will save checkpoint data during model training. For more on logging and monitoring with TensorFlow, see Logging and Monitoring Basics with tf.contrib.learn.
Describe the training input pipeline
The tf.contrib.learn API uses input functions, which create the TensorFlow operations that generate data for the model. In this case, the data is small enough that it can be stored in TensorFlow constants. The following code produces the simplest possible input pipeline:
# Define the training inputs
def get_train_inputs():
  x = tf.constant(training_set.data)
  y = tf.constant(training_set.target)

  return x, y
Fit the DNNClassifier to the Iris Training Data
Now that you've configured your DNN classifier model, you can fit it to the Iris training data using the fit method. Pass get_train_inputs as the input_fn, and the number of steps to train (here, 2000):
# Fit model.
classifier.fit(input_fn=get_train_inputs, steps=2000)
The state of the model is preserved in the classifier, which means you can train iteratively if you like. For example, the above is equivalent to the following:
classifier.fit(x=training_set.data, y=training_set.target, steps=1000)
classifier.fit(x=training_set.data, y=training_set.target, steps=1000)
However, if you're looking to track the model while it trains, you'll likely want to instead use a TensorFlow monitor to perform logging operations. See the tutorial “Logging and Monitoring Basics with tf.contrib.learn” for more on this topic.
Evaluate Model Accuracy
You've fit your DNNClassifier model on the Iris training data; now, you can check its accuracy on the Iris test data using the evaluate method. Like fit, evaluate takes an input function that builds its input pipeline. evaluate returns a dict with the evaluation results. The following code passes the Iris test data—test_set.data and test_set.target—to evaluate and prints the accuracy from the results:
# Define the test inputs
def get_test_inputs():
  x = tf.constant(test_set.data)
  y = tf.constant(test_set.target)

  return x, y

# Evaluate accuracy.
accuracy_score = classifier.evaluate(input_fn=get_test_inputs,
                                     steps=1)["accuracy"]

print("\nTest Accuracy: {0:f}\n".format(accuracy_score))
Note: Thestepsargument toevaluateis important here.evaluatenormally runs until it reaches the end of the input. This is perfect for evaluating over a set of files, but the constants being used here will never throw theOutOfRangeErrororStopIterationthat it is expecting.
When you run the full script, it will print something close to:
Test Accuracy: 0.966667
Your accuracy result may vary a bit, but should be higher than 90%. Not bad for a relatively small data set!
Classify New Samples
Use the estimator's predict() method to classify new samples. For example, say you have these two new flower samples:
| Sepal Length | Sepal Width | Petal Length | Petal Width |
|---|---|---|---|
| 6.4 | 3.2 | 4.5 | 1.5 |
| 5.8 | 3.1 | 5.0 | 1.7 |
You can predict their species using the predict() method. predict returns a generator, which can easily be converted to a list. The following code retrieves and prints the class predictions:
# Classify two new flower samples.
def new_samples():
  return np.array(
    [[6.4, 3.2, 4.5, 1.5],
     [5.8, 3.1, 5.0, 1.7]], dtype=np.float32)

predictions = list(classifier.predict(input_fn=new_samples))

print(
    "New Samples, Class Predictions:    {}\n"
    .format(predictions))
Your results should look as follows:
New Samples, Class Predictions: [1 2]
The model thus predicts that the first sample is Iris versicolor, and the second sample is Iris virginica.
Additional Resources
-
For further reference materials on tf.contrib.learn, see the official API docs.
-
To learn more about using tf.contrib.learn to create linear models, see Large-scale Linear Models with TensorFlow.
-
To build your own Estimator using tf.contrib.learn APIs, check out Creating Estimators in tf.contrib.learn.
-
To experiment with neural network modeling and visualization in the browser, check out Deep Playground.
-
For more advanced tutorials on neural networks, see Convolutional Neural Networks and Recurrent Neural Networks.
© 2017 The TensorFlow Authors. All rights reserved.
Licensed under the Creative Commons Attribution License 3.0.
Code samples licensed under the Apache 2.0 License.
https://www.tensorflow.org/get_started/tflearn


